Grasshopper, which is gaining immerse popularity within certain design disciplines, is a generative design and modeling plugin for Rhinoceros 3D. It can also be used to add parametric control to Rhino 3D models. As of this writing, it can be downloaded freely from http://www.rhino3d.com/download/grasshopper/1.0/wip. Studiorola offers Basic Grasshopper for Rhino 3D Training (In Singapore).
This tutorial explores the software interface of Grasshopper. To be able to follow this tutorial well, the Reader will need to have a basic proficiency of Rhinoceros, the popular, user-friendly and amazing NURBS 3D modelling program.
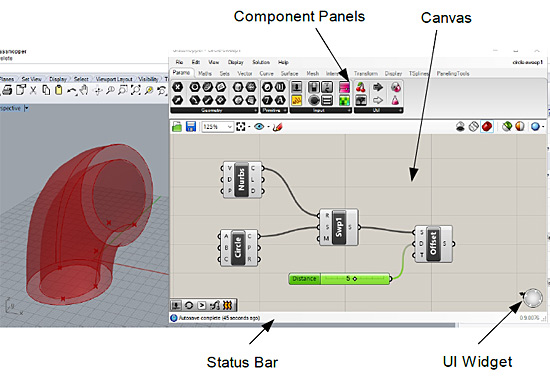
The interface layout and its elements are as shown below.
Typical Workflow
Typically, the workflow follows the following steps as described below:
1. At Rhino command prompt, execute Grasshopper command. This will open up the Grasshopper window.
2. Add components onto the canvas
3. Drag connectors from output sockets to input sockets to establish the connections.
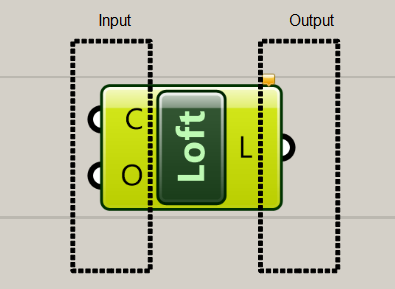
Anatomy of a Node
The left side sockets are for receiving inputs; whereas the right side sockets are for downstreaming outputs.
Colours of node and their corresponding meanings
Orange – with warnings
Green – is selected
Light Grey – no warning or errors
Darker grey- preview is disable
Greyed out – has been disabled
Red – has errors
Basic Operations
There are 2 methods of adding components onto the canvas
Method 1: Drag a new component onto the canvas
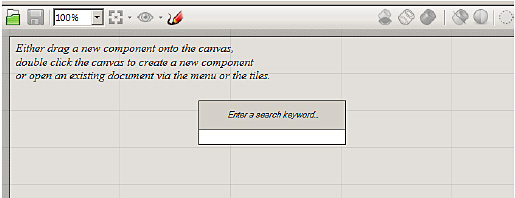
Method 2: Double click on the canvas to bring up the keyword search box.
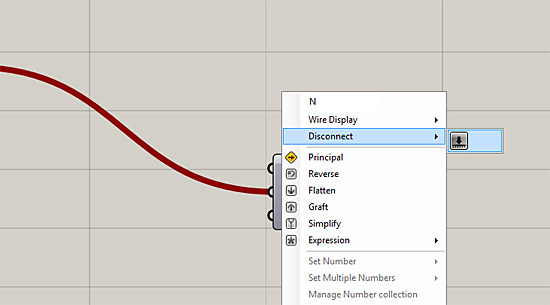
To disconnect from a socket, right-mouse click, select Disconnect.
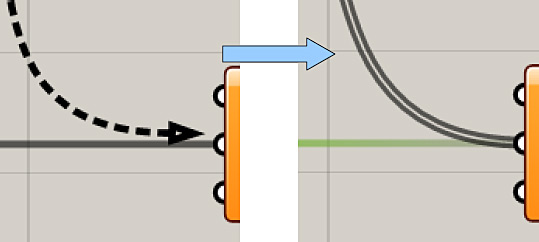
To connect to a socket which already has an existing connection, press and hold the SHIFT key
To copy Node, drag the component and press the Alt key.
Data Input methods
Generally, data can be from the following sources:
1. Referenced from Rhino objects
2. Assign values for component
Saving Grasshopper Definition
The algorithms that are built in Grasshopper are referred to generally as definitions. To
save a definition in Grasshopper, go to File > Save or File Save As commands.
A Grasshopper definition can be saved in 2 formats:
1. .gh format is for Grasshopper binary
2. .ghx format for Grasshopper XML.
.gh is the default format.
Converting to Rhino surfaces – Bake surfaces
To convert Grasshopper previews into geometry that’s editable in Rhino, we need to
use the bake command.
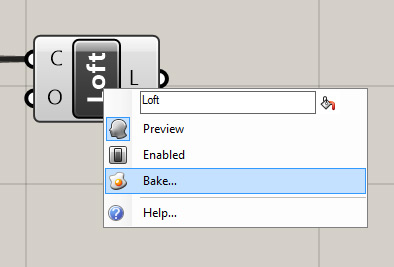
To do that, hover cursor over component whose geometry you’d like to convert in to
editable geometry. Right click and select Bake.
That is all for a very simple and basic intro. Hope that it is useful for you starting on using Grasshopper.

THX! Useful!!
To connect to a socket is simple but to disconnect or delete a connection looks impossible to understand it intuitively. I’m still trying to find the answer. I Press right click over the socket and there is no delete connection. There is no cut tool holding control or alt.