This is Part 2 of Blender 2.5 Symmetry Modelling.
>> Click here to go back to Part One.
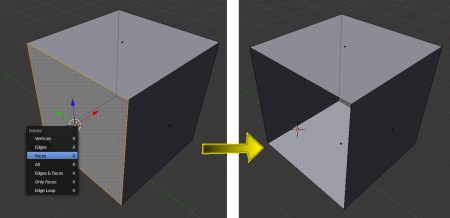
Now, we need to delete away the face that will be overlap the mirroring plane. To do so, select the cube make sure that it is in edit mode (toggle with TAB key). Select the face to be deleted and press DEL key. In the options, select ‘Face’.

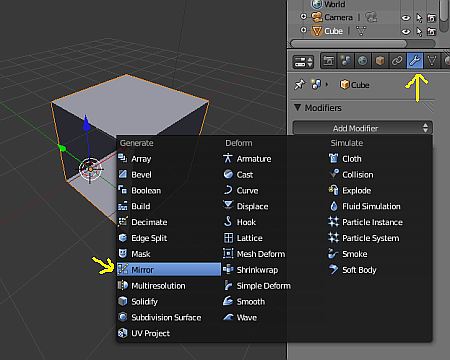
After, it has been deleted, we can now add a Mirror Modifier. To do that click the “modifier’ button on the property panel and select ‘Mirror’. This is as shown below.

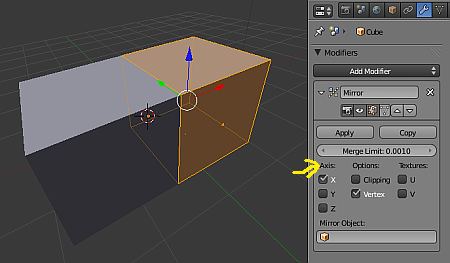
Now, the mirrored side should appear. Make sure that we have selected the correct Axis of mirroring.

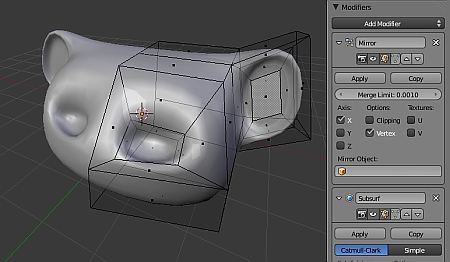
From here, we can process with the rest of the symmetry modelling. By using commands such as extrude (E key), deleting and creating new faces (F key), subdivide and finally adding subsurfacing, we can create all kinds of symmetrical shapes. Please note that if the model needs to be sent to a 3D printer, it needs additional requirements for successful 3D printing. What is 3D printing ?

That’s all for this Blender 2.5 tutorial. Thank you for reading 🙂

woow .. really nice tut ..so helpful THANKS =)