This is Part 2 of Blender 3D Tutorial for Turntable animation. This tutorial is for the Blender 2.5 or higher.
>>> Click here to go back to Part 1 of this tutorial.
8. Go to the Graph Editor
9. The Cube should be indicated at the right panel. Click and select Rotation from the Cube>> CubeAction dropdown.
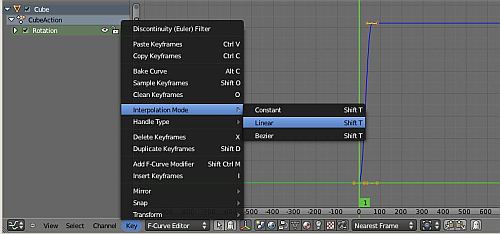
10.Go to Key>> Interpolation Mode >> Linear. This will make the speed of rotation constant. The default is Bezier which have changing speed rate.

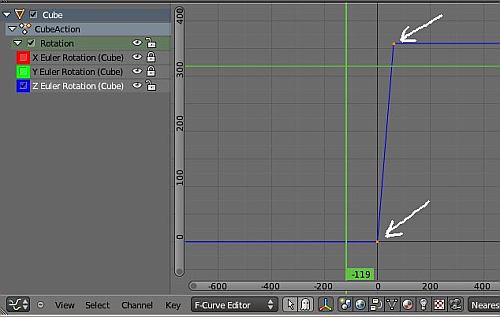
11. Uncheck X and Y Euler rotation
12. Click select Z Euler Rotation. This will be highlighted as white text.
13. RMB click to select the 2 control points on the graph. This is as indicated by the 2 white arrows in the screenshot below.

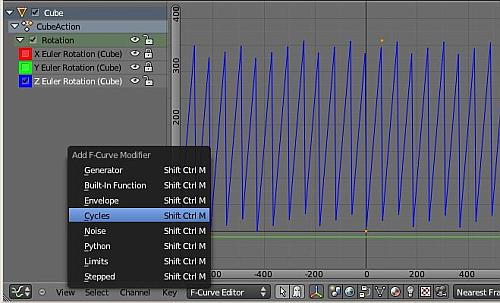
14. Go to Key >> Add F-curve modifier
15. Select Cycles as the option

Now, if you do an animation preview ( Alt + A keys), you should see the cube rotation at the same spot continuously.
That’s all for this Blender 2.5 (or higher) turntable animation tutorial. I hope that it has been useful for you.

How do you export this?!