This is Part 2 of ‘Creating a rolled sheet design’ Rhino3D tutorial.
>>> Click here to go back to Part 1.
Now, we need to create the 2D profile of the roll. We do this by creating the curve in the appropriate view. This view must be perpendicular to the flat surface sheet that was previously created. It is better to use the Control Point Curve for curve creation as it produces better quality curve that the other options. For a better understanding, see the screenshot below.

A point to take note is that the newly created 2D profile curve should be of the same length as the length of its flatten surface. One can use the Analyze >> Length tool to check the lengths of the curves. This is as illustrated below.

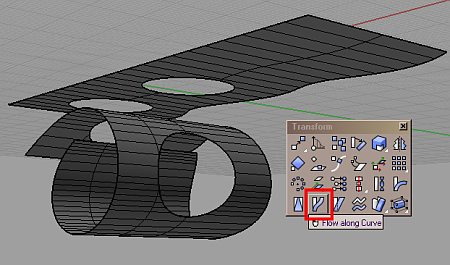
Now, we can start to create the final rolled surface. To do that, use Transform >> Flow Along Curve. When prompted with ‘Select Objects to flow along curve’, pick the flat surface. Press ‘enter’ to complete the selection.
Next, Rhino will prompt you to ‘select the base curve’. Select one end of the original flat curve.
Next, Rhino will prompt you to ‘select the target curve’. Select the corresponding end of the 2D Profile Curve.
You should get the final result similar to what is shown below.

To purchase Rhinoceros Surfacing Techniques Book via Amazon, click on book cover image below.
Note: The above video tutorial is not included in the book.
That is it! Thanks for reading this tutorial 🙂


great tutorial. thanks
i am a new learner, i want to learn Rhino,but i don’t what shall i do at first.
Hi Naomi,
For a beginner to Rhino, the level 1 Training manual that comes with the software is a very good starting point.